Fixit Troubleshooting & Repair

I was having problems reading some Microchip eeproms in an old Panasonic phone. Newer phones had similar eeproms and I could read and write fine but the old ones would read all 0s (not blank FFFF) and blank check would fail… could not write (program) and verify would fail.

93LC46BX
93LC66BX

I thought maybe my Minipro programmer was broken so I ordered a cheap EZP2019+ but that had the same issue

I could read / write / verify the 93C56W with no problems on both programmers!

After many hours searching on google I never did find a similar issue or explanation that would help me figure out what I needed to do. But at my last glance at a datasheet I saw this little note:

ROTATED SOIC
(ex: 93LC46BX)

ROTATED IC?!?
AH-HA!!

A little barely mentioned fact that some 93LCxx eeproms have a rotated pinout!

I had tried setting my programmer to 93LC46B (BX was not available) and thought that would be the closest match.
NOPE! But when I selected 93LC46X THEN the programmer would read and write to the IC.

So maybe this will show up for someone else searching google for an answer. If you cannot read a Microchip eeprom 93LC46 or 93LC56 or 93LC66, etc… maybe try the rotated pinout option in your programmer (part number ending in X on my Minipro programmer)

If you don’t have the option of selecting a rotated IC in your programmer you could make or buy an adapter

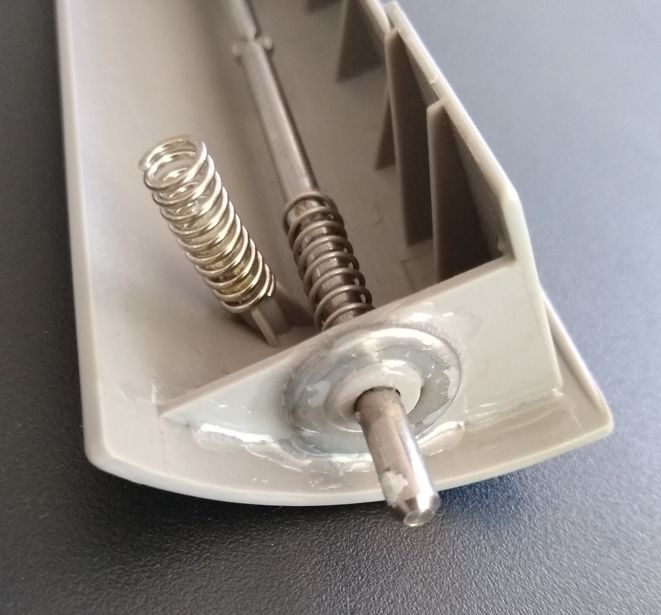
I picked up one of these portable 12v/24v DC freezers at a good deal because the lid latch was broken. Here I will show you how I repaired it.

Cracked latch. This will completely break off soon if not taken care of!

To remove the latch use a flat-head screwdriver in the notch found at the center of the rod to slide the rod toward the side spring. This will slide the left side out of the hole in the lid and allow you to pull out the latch.

I found a washer that just pressed on tight. You may need to take the latch to a hardware store to pick out one that fits around the plastic and also inside the latch handle.


I glued the washer and also reinforced the plastic using melted ABS in M.E.K. solution. You probably won’t have that but you should glue it in there.

You might as well put washers on both sides while you have it apart, even if the other side is not broken yet.

You should glue / repair the cracked plastic before adding the washer. Model glue plastic cement is OK for the plastic but can’t be used to hold the washer in place.

DO NOT USE: super glue, crazy glue, etc…
I repeat… NO SUPER GLUE!!!!! Just don’t!!! It will not last and it will make it more difficult to repair next time. And there WILL be a next time!
DO NOT USE: cheap clear 5-min epoxy
DO use plastic epoxy (I like Loctite Plastic Bonder 20 min – opaque amber)
JB weld is OK (scuff up the plastic first)
Whatever glue you use make sure you don’t glue the metal rod!

When you go to put the repaired latch back in, you need the door open… put the right side of the rod in first. The two springs sticking out should fit inside the little raised slots on the lid. You can press in the rod from the left and it should slide down and into that hole on the left side.
The spring on the rod should snap the rod into the hole once you have it lined up, but for me I needed to help it back in using the screwdriver (the same way I got it off but in reverse).

FYI

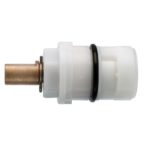
The kitchen faucet cartridge (model 3S-11) for Glacier Bay, AquaSource, Danco, etc… works just fine in the Kingston Brass KS213ORB Magellan Faucet

3S-11C for the cold side (replaces KC1000C)

3S-11H for the hot side (replaces KC1000H)

I found these locally at the big box stores for cheap and decided to give it a try instead of mail ordering the more expensive brass part from Kingston Brass.


A common failure for the small LCD displays found in electronics – missing lines.

bad lcd missing lines

Red arrows indicate missing lines in LCD
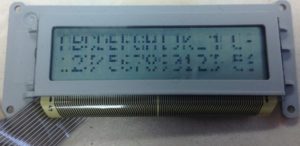
Unreadable LCD screen

Unreadable LCD screen


Are you stuck with a bad LCD that has missing lines? It is not easy finding replacement LCDs for most situations because a lot of them are custom made for a single device and just not available separately. Also the driver ICs quickly become obsolete as manufacturers find better way to do things like faster response, lower power usage or more features, etc.. so it may not even be possible to duplicate the LCD even after as little as 3 years.

If you have an LCD you would like to try to repair, maybe this information will help you accomplish your goal.

There are several ways of connecting the circuit board to the glass. The two most common are by a zebra connector (a rubber conductive strip held by pressure between the glass and the PCB) or by using a heat seal flexible conductor strip. The second is what I will be covering here. The heat seal is prone to problems late in life. As the connector dries up and exposed to alternating temperature it can lose conductivity in some of the contacts… and that causes the missing lines shown in the pictures here.

The heat seals have conductive adhesive holding them in position. They are assembled using a complicated heat sealing machine that is out of reach for even the most technically equipped of us. It is however possible to repair them with common equipment and supplies. 🙂

The first thing you need to know is the problem is almost always (more than 99% of the time) on the PCB side of the connector. The glass side hardly ever has a problem.


LCD DIsplay showing the heat seal connector

The heat seal on the circuit board side is always the problem

Now to repair your defective LCD, all you need to do is heat up that strip while applying pressure. Easy! Or is it??

The temperature required varies a bit and needs to be up there around 300 F or more. It’s unlikely you will have access to tools that can both apply heat and pressure at precise temperatures but the good news is I’ve found they are not too picky about too much heat (within reason)

Heating with a heat gun and then applying pressure does not seem to work. The good news is, a tool that can work is just as easy to come by…. it’s a soldering iron! Now you cannot just start jabbing the heat seal with a soldering iron set to melt solder. The temperature has to be lower or you will instantly melt the plasticky/paper conductor strip. Also the hard metal pointy tip isn’t the best.

What I have found success with is using a large soldering iron tip on a soldering iron set at a very low temperature (400 F is a good start) with a thin silicone pad between the iron and the heat seal. I cut a strip off a transparent silicone rubber keypad from a telephone dial pad.
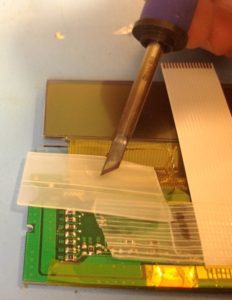
Repairing LCD with missing lines using soldering iron

Regular (large) soldering iron tip with silicone pad

It does take some practice and you need to be careful. It’s easy to slip off the pad and touch the fragile ribbon cable directly with the iron. The ribbon cable will melt almost instantly even at these low temps. Also you can rip through the silicone pad with the iron tip. If you plan on doing this more than once you may want to consider modifying a soldering iron tip to make it easier.
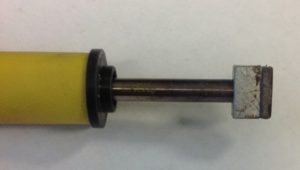
modified heat seal repair tip

Custom Heat Seal Repair soldering iron tip with rubber pad.


This is the ultimate solder-tip mod for repairing LCD displays. It’s an aluminum block with an infused high temperature rubber layer. I cut out a small rectangular piece, drilled a hole in the aluminum and just press fit a soldering iron tip that I cut the pointy tip off of. This makes it easy to apply strong downward pressure over a larger area without much risk of slipping.
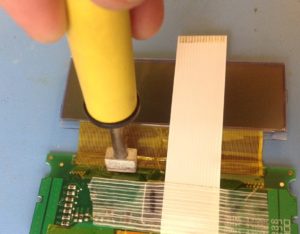
 

LCD repair using modified tip

LCD repair using modified tip


Using this tip and this technique, I have been able to repair many defective LCD displays. I even repaired one that the ribbon cable had been totally ripped off the circuit board and sat in a box for over 2 years.  I have also installed new heat seal ribbon cables on both the glass and the PCB using this tool.
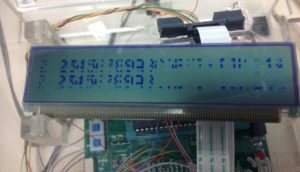
A bad LCD shown before attempting repair

A bad LCD shown before attempting repair


The LCD after heat seal repair

The LCD after heat seal repair

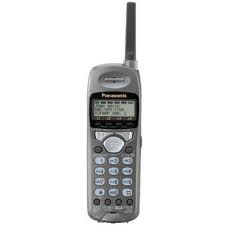
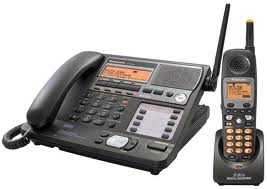
Panasonic KX-TGA400b cordless phone

Panasonic KX-TGA400b cordless phone

The most mysterious and annoying problem with the Panasonic KX-TGA400b and KX-TGA200b cordless phone is what I call “Choppy Transmit” It is extremely common and has several causes…. but the difficult part can be simply diagnosing the problem (especially for the end-user)

Choppy transmit only effects the transmitted radio signal. You cannot hear the problem in the phone that is broken.

It’s easy to assume when you hear a problem that the device you hear the problem in is the cause… but that’s not the case most of the time with the KX-TGA400b series phone. Also… you can go unaware of any issue at all for a very long time, unless someone on the other end of the call starts to complain. The problem usually starts with some pops and clicks. As it progresses small bits of words will be left out and your caller will have difficulty understanding what you are saying. It will continue to worsen and eventually your phone will start to lose connection to the base and you will be presented with an error on the LCD asking you to move closer to the base.

The problem is caused by a very picky RF module (that’s the Radio Frequency module BTW)…. and there are many causes ranging from bad connections, broken solder, cracked tracings, corrosion from exposure to liquids or high humidity (sometimes form many years in the past), and even bad batteries.  Some of these problems can be very difficult or even impossible to locate and repair. The RF module is a multi-layer PCB daughter board held down by dozens of solder points and electronic adhesive…. it’s extremely difficult to replace and the only source for replacements are from other phones (meaning you have to remove it twice!). Luckily the most common issues do not require replacing the module itself.

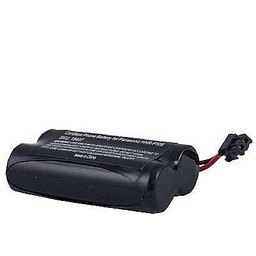
Panasonic kx-tga400b battery

Panasonic KX-TGA400b Battery

The first thing the owner should do is try a different battery and make sure it’s fully charged. If the problem only happens after the phone has been in use and off the charger for some time then it may just be a bad battery.

How can you tell?? After all, you cannot hear the problem in the cordless phone remember…. What you need to do is make an intercom call to the base station (Intercom then 0). Put the base unit in speakerphone and just place the cordless phone on the table. If you hear pops and clicks over the base speaker then the RF module is having connection issues. If you want to get even fancier, try using headphones from an MP3 player near the cordless phone microphone so you can listen to some tunes over the base phone’s speaker.


So I just upgraded to Windows 8 and here is an unusual problem I ran into.

I installed Windows 8 on a new hard drive. I had no problems installing and used the new OS for 24 hours without issue. The next day I installed my old drive as drive G: and I wanted to delete the old Windows installation. No matter what I tried I could not change the permissions to allow me to delete the old Windows install. I found a tip to boot to a command prompt using a Windows CD and I should be able to delete it from there. I used a Windows XP disk and booted to the repair console (pressing R at the first menu) from there I was able to navigate to the G: drive, confirm I was on the old hard drive and tried the command rd /s /q “G:Windows” to remove the old directory. It did not work and I was given “Access Denied” message. Maybe I had done something in my many attempts to gain permissions over the folder inside Windows… anyway, I gave up and reset the PC to boot back into Windows 8. That’s when the trouble started…..

I quickly received a blue screen telling me there was a problem booting and I needed to run repair using the original Windows DVD.  I received the error 0xc000000e and I was informed that an important file was missing: windows/system32/winload.exe

Any attempt to repair the problem using the Windows DVD failed instantly with just a message that the system could not be repaired. I even tried the refresh and reset options (to delete all files and updates) but all failed instantly. The only option that worked was the command prompt where I noticed something interesting…. the C: drive was empty! My Windows installation and files were all on the D: drive. That isn’t good. It’s very important that the Windows installation is in the C: drive!

I booted the PC using Acronis Disk Director software to see that my drive had 2 partitions. Both partitions were set as active and primary and the C: partition was only about 350MB. I deleted the partition and rebooted the PC. Again it complained that there was a problem but it was able to Auto Repair without the need of the original DVD. After a couple of re-boots the PC booted correctly. All of my files and settings were just as they were before the problem.

My victory was short lived because I then installed a new raid hybrid card to run a SSD and HD as a hybrid drive. On my next reboot I ran into the same issue! error 0xc000000e and again the partition I deleted was back and set as primary. This time I tried more drastic measures to delete the partition and ended up damaging my windows installation too. Luckily I had made a disk image of the installation and I was able to restore from my backup.

I read that the mysterious partition called “System Reserved” is something that windows 7 creates when installing a fresh copy on a new drive. Apparently Windows 8 does this as well. It is not required to use windows but I read that it is used for BitLocker. I’m still not sure exactly what is causing this partition to become active primary. At first I thought it was the old Windows XP CD that I used to get to the command prompt but I did not use this CD the second time. I believe now that the problem may be related to the old drive being put back in as a secondary drive and when a Windows repair action is performed it sets the System Reserved partition as active.

If anyone encounters the same or similar issue… please post a comment letting me know what you found.

Is your Panasonic cordless handset going dead? Resetting? Does the screen go blank for a few seconds then give you an error to move closer to the base?

Typically this happens only at the most inconvenient of times… (while you are using the phone of course!) Most phones with this problem will work just fine as long as you leave it alone on the table or in the charger where it’s as useless as a glass of sea water in the desert.

So what’s the deal? Unfortunately this is a very common problem in many models of Panasonic cordless phones. It is caused by a drop in available power to the phone. It’s more likely to happen when the phone needs the most power (when on a call) and when the phone is being moved (as you handle it during a call).

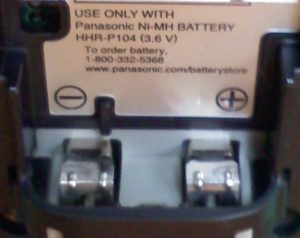
Open up your battery door. Does the battery just clip in without any wires or coiled springs? Are there just two metal flat contact plates for the battery connection??? Like this…..

Panasonic cordless phone battery connection

This type of battery connection works fine with a new battery… a properly designed battery… and new metal contacts free of dirt or oxidization (at the peak of their conductivity potential). After a few years of use, maybe with an older battery or an aftermarket copy… your phone is very likely to experience this power issue problem. The flat contacts are not a very powerful spring and under a microscope the flat metal plates are only touching in a few tiny locations. All the battery power running through one area causes oxidization and reduced conductivity…. and as you jiggle the phone (in normal use) the battery can bounce ever so slightly causing an additional drop in moving electrons.

Old batteries do not help the situation.


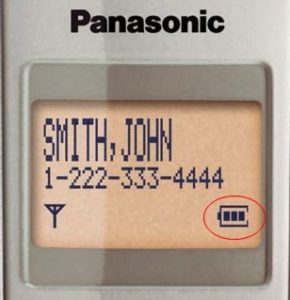
panasonic lcd battery display

Your phone is just guessing when it’s telling you the battery is fully charged. There is no easy way to test a battery and these phones do not have the circuitry for any more than a guess that relies on how long it’s been in use vs. how long it’s been on the charger.  Old batteries have less force to push out those electrons and there is just no way for your phone to alert you to the problem.

To make matters worse…. the poor battery connection doesn’t help the life of your battery. A poor connection can cause the phone to charge the battery when it does not need it. Over-charging is bad… not horribly bad… but over time it can really kill a battery. Also, never letting the battery fully drain to it’s potential isn’t so great for it either. Every time your phone resets because of a poor connection, it’s probably deciding that the battery is dead and needs a full charge, even if it just did that 15 minutes ago. You may even notice your phone getting warmer in the charger.

Could it get any more confusing?

It seems like a straight forward problem that should be easy to spot…. real world experience does not agree however. I’ve seen plenty of instances when one battery works fine in one phone but has power drops frequently in another. Swapping around batteries isn’t always a quick confirmation of the problem or validation of a good battery.  Improving the contacts with springs doesn’t fix old batteries which can and do offer up the same symptoms all on their own. Even new batteries can be junk… poorly made… weak cells… old stock… defective… or even more likely –> quickly damaged by a malfunctioning over-charging, under using, poor battery terminal phone.

What can you do about it??

A new battery might help but really you need better battery contacts. At p1repair we install springs in every model that uses this type of battery contact. We tried other solutions, like beefing up the contacts with added metal… copper fiber…. conductive glue… even lead. They all helped a little but they did not solve every issue or last reliably.
Known effected models:
KX-TGA650b, KX-TGA450b


Do you have a dead Panasonic KX-TG4500b base station? 

The #1 cause of a dead base station is the power supply. The new switching power supplies are more energy efficient and they can provide more power in a smaller package than the the old transformer type wall-warts. The downfall is they break far more easily. This problem is rarely ever seen in the older systems that use transformer type supplies.

It’s easy to check
In this model (the 5.8gHz KX-TG4500b) the same power adapters are used for both the base station and the small cordless handset charger stands.  Try swapping the power supply and see if that solves the problem. If it does, that should get you by until you can locate a replacement power adapter.

For a replacement you can use either a switching power supply or an older transformer type. If you have a choice I recommend the transformer type as they rarely ever break.

Compatible power adapters
You need to know 4 things to match up your power adapter.

  1. Voltage
  2. Amps (or watts)
  3.  Plug size
  4. Plug polarity

The voltage should be the same output as your old power supply. Also make sure the type is the same (AC or DC). If you are replacing a 9vDC power adapter you want the same exact value and type

Amps (A, mA, or watts) needs to be the same or higher. Amps is the available power and the device will only use what it needs at any particular moment. You can replace a bad 9v 500ma (that’s half an amp) with a 9v 2A (2 full amps) but not a 9v 250ma (quarter of an amp). Watts is just (amps x volts) so if you are using the same voltage supply then you just need the same or greater wattage power supply. Most power adapters list power in amps.

Plug size is important. If it’s wrong your adapter will either not fit or it will be too loose and cause problems. Typical sizes are 5.5mm x 2.1mm and 5.5mm x 2.5mm. It’s hard to tell the difference by eye and most power supplies are not labeled so it can be difficult to match.

Plug polarity is also very important. With these typical barrel plugs it will either be center positive or center negative. There is almost always a little diagram on the label showing a + and a – with lines pointing to the center of a circle and another to the outside edge. This needs to match on your replacement supply.

What if it’s not the power adapter?
The next thing to try would be the reset button on the bottom of the phone. If that does not help I’m afraid you’ve run out of options and it will either have to be replaced or sent in for repair.